What’s the difference between continuous and batch brewing kombucha? And which brewing setup is best for you? Breaking down everything you need to know about continuous vs batch kombucha here!
If you’ve been digging into the kombucha world online, you may have run across the terms “continuous brew” or “batch brew”. And if you’re anything like me when I first heard the terms, you’re wondering what they are and, more importantly, which is better for making kombucha!
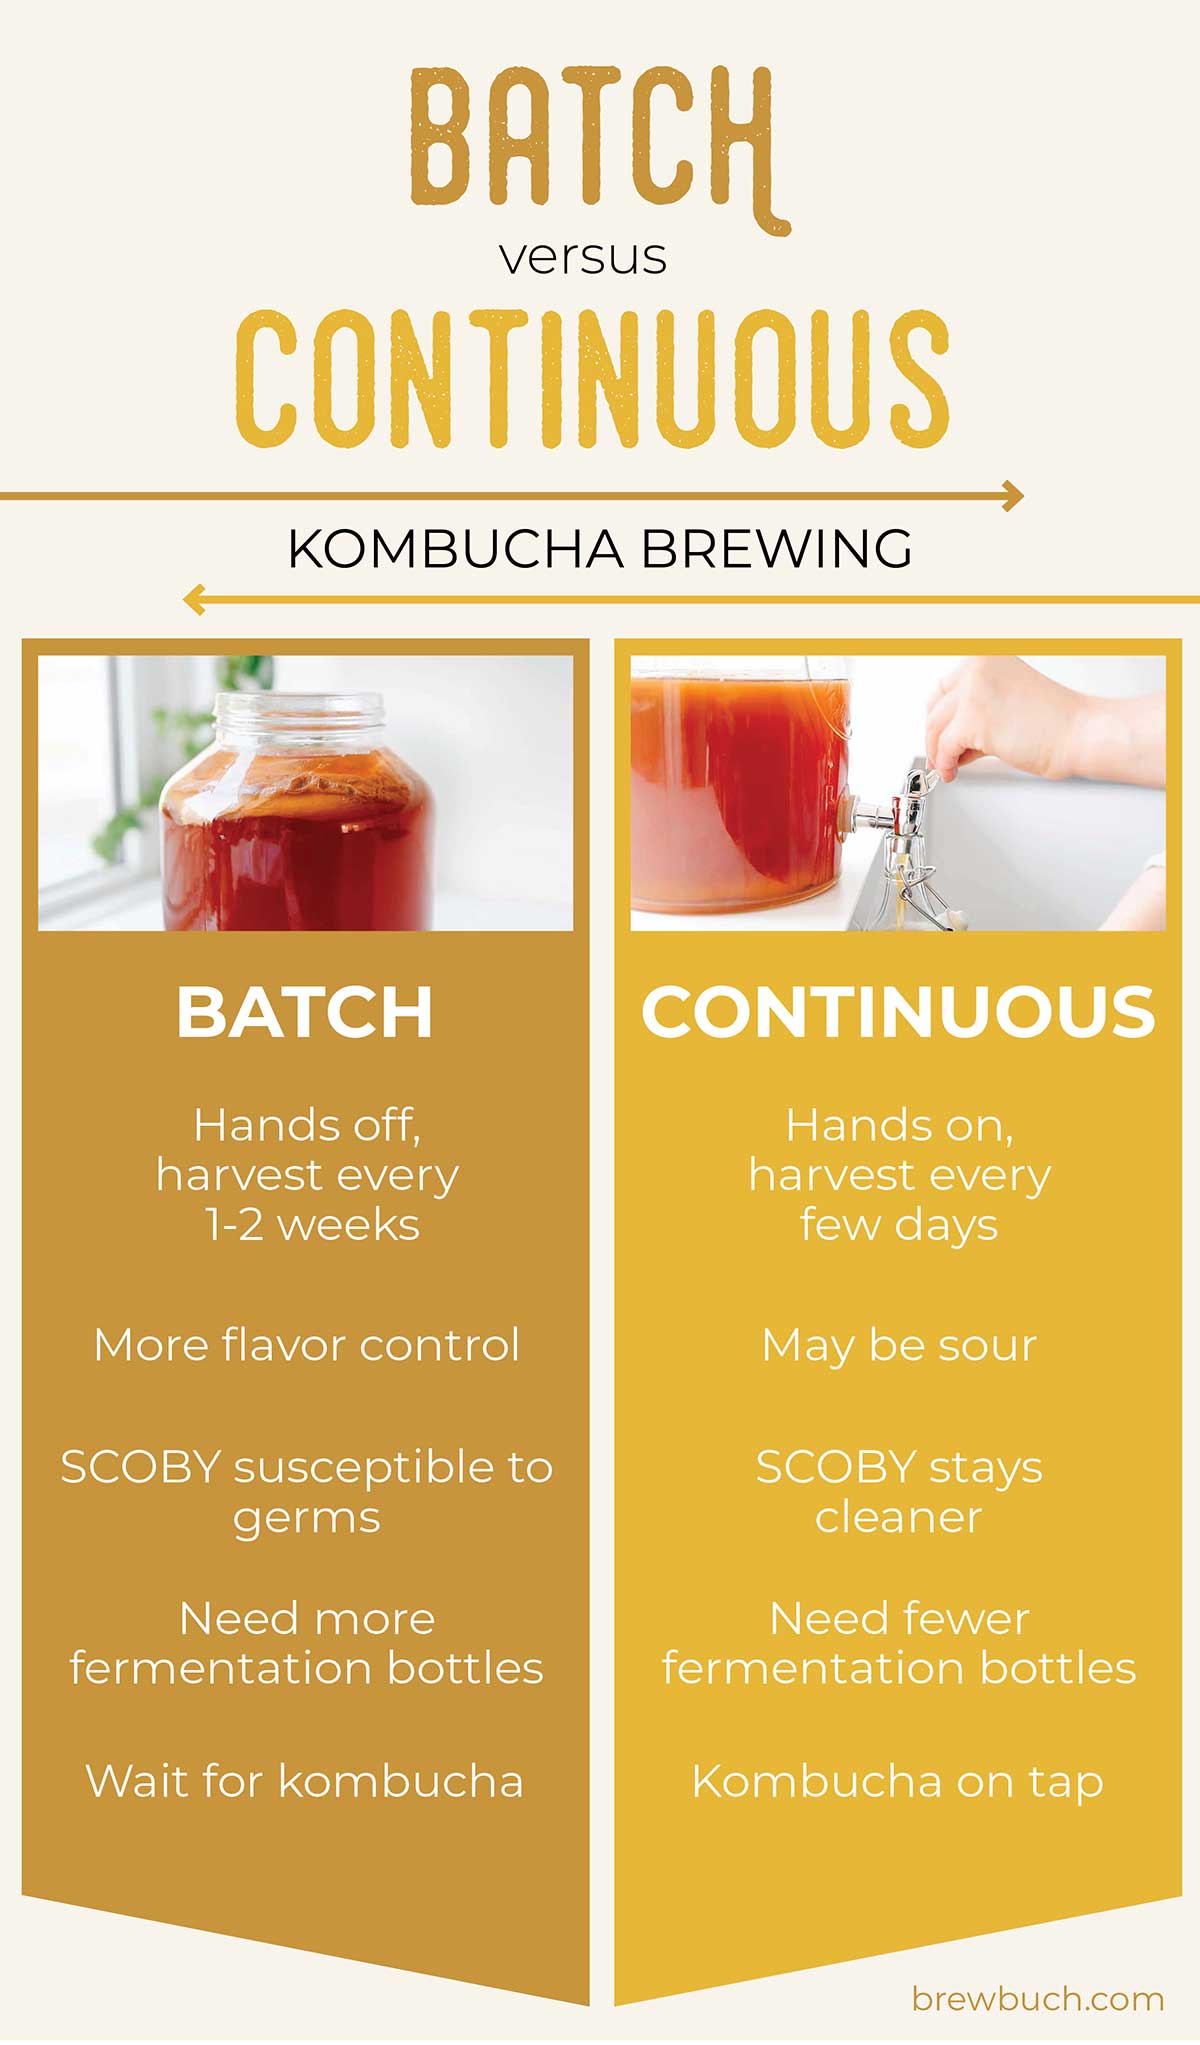
The difference between continuous and batch kombucha all comes down to timing – when are you harvesting the kombucha? With batch brewing, you harvest the kombucha all at once, while with continuous brew kombucha you harvest gradually over time.
I personally use and love the batch brew method of kombucha (and use it for all kombucha recipes on this site), but I’m breaking down the pros and cons of each below.
Batch Brewing
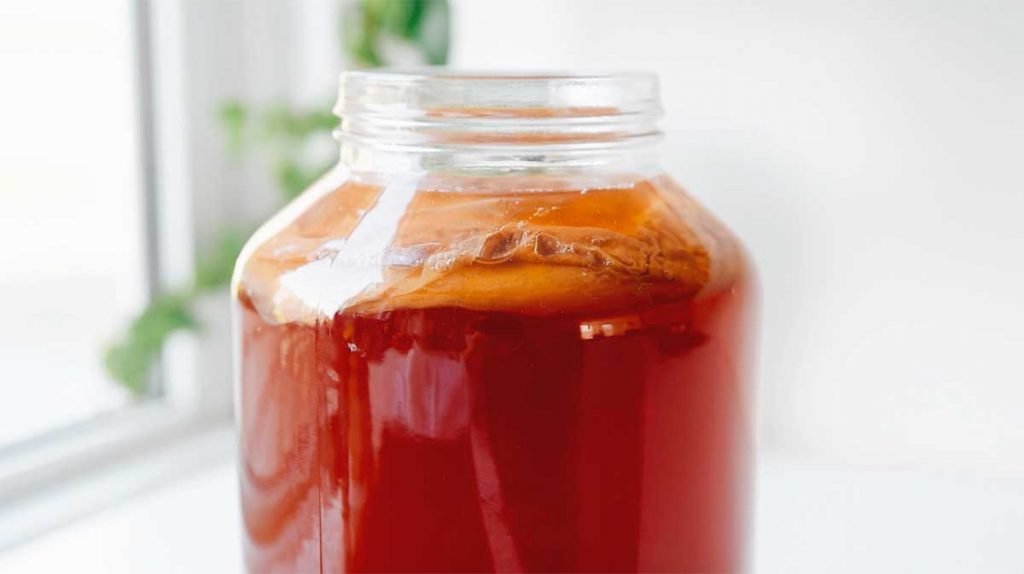
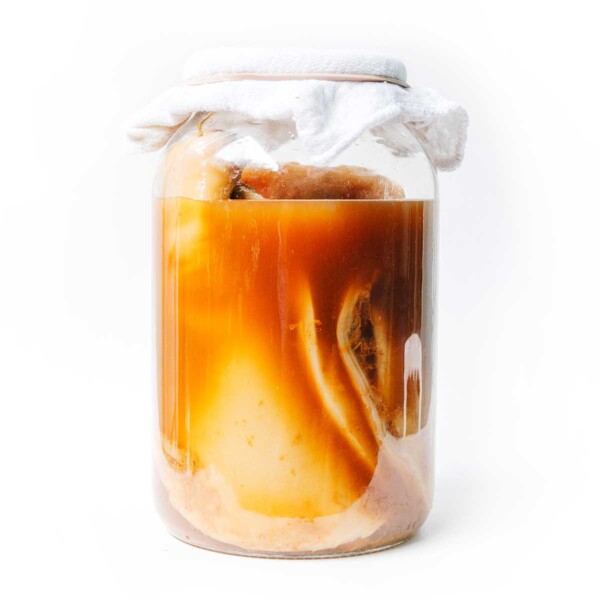
Batch brewing, as the name suggests, is when you brew a big pot of kombucha and harvest it all at the same time (leaving a little starter and the SCOBY to start the next batch).
With batch brewing, you typically have a harvesting day where you transfer the finished kombucha into bottles, then add new sweet tea to your first fermentation vessel to start the process over again.
The first fermentation vessel in batch brewing usually isn’t large, about 1 to 2 gallons.
Pros of Batch Brew
- Hands-off: Flavoring and bottling all happens on one day, then it’s hands-off for the next 1 to 2 weeks (until the next batch is ready to be bottled).
- Flavor control: After you get used to the fermentation lengths needed for your environment, it’s pretty easy to control the flavor of the kombucha by letting it run longer or shorter.
Cons of Batch Brew
- Susceptible SCOBY: When you harvest the kombucha, you’ll most likely need to touch or remove the SCOBY, making it susceptible to contaminants. Make sure your hands and equipment are clean (here’s how I clean kombucha supplies).
- Bottling Day: While batch brewing is hands-off throughout the week, on harvest day you’ll need to set aside a chunk of time (1 to 2 hours) to bottle and flavor all the kombucha.
- More Bottles: With batch brewing, the kombucha will all be ready at the same time, meaning you’ll need enough fermentation bottles to fit all of that kombucha!
Continuous Brewing
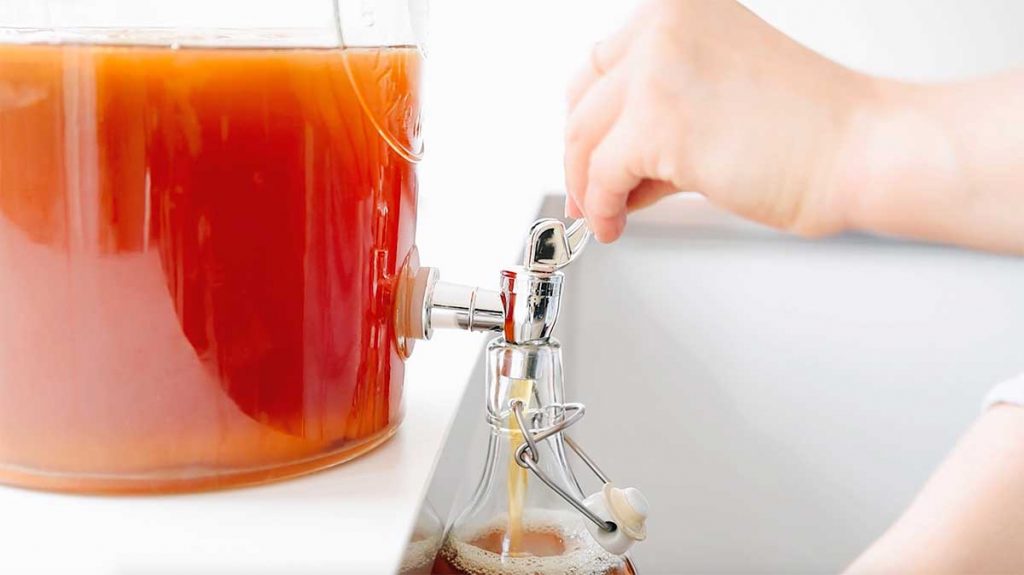
Continuous brewing is different from batch brewing in that you harvest the kombucha continuously, rather than all at the same time.
Most continuous brewing setups involve a large vessel (2 to 4 gallons) with a spigot. You draw kombucha out via the spigot whenever you want to drink some, then replace it with the same amount of sweet tea.
This sweet tea is quickly inoculated by the kombucha in the vessel because there is more starter tea present, meaning the first fermentation happens more quickly in continuous brewing.
Pros of Continuous Brew
- Kombucha on tap: If you like drinking kombucha straight from the first fermentation (without flavor or fizz), then continuous brewing is great. You’ll have fresh kombucha whenever you want it, and don’t have to wait for harvest days.
- Large Households: A larger brewing vessel and more steady supply of kombucha make this a great choice if you’ve got a lot of kombucha drinkers to satisfy.
- Safer SCOBY: The SCOBY is handled less in continuous brewing because you’re using a spigot to remove the kombucha, meaning it is less likely to be contaminated.
Cons of Continuous Brew
- Flavor and fizz: While you can flavor and bottle kombucha from continuous brewing, it’s not as convenient. Rather than prepping a large amount of fruit or puree (such as how we do in batch brewing), you’ll need to prepare smaller amounts more frequently.
- More daily work: You’ll also need to do more work on a daily basis, such as steeping tea to replace what you took and checking the flavor.
- Yeast settles: Yeast naturally settles in the bottom of the vessel, so you’ll need to remember to stir or swirl the kombucha before harvesting through the spigot.
How I brew kombucha
So how do I brew kombucha? With batch brewing! While I can see how continuous brewing would work well for some people, batch brewing is just what works well for us.
A large part of this is because I don’t actually store my kombucha in the kitchen, but downstairs in our warm guest bedroom! To continuous brew would mean lugging my kombucha upstairs every few days, which…ain’t nobody got time for that.
Similarly to continuous brewing, I use a large vessel (2 gallons) with a spigot, but I draw off all of the kombucha on harvest days (except the starter tea for the next batch), then bottle it all at once. These harvest days get slotted into the calendar, and I spend an hour or two playing with flavors, bottling, and prepping the next first fermentation.


I forgot to add the starter for the second fermentation three days ago.
Can I reuse the process by still adding starter kombucha?
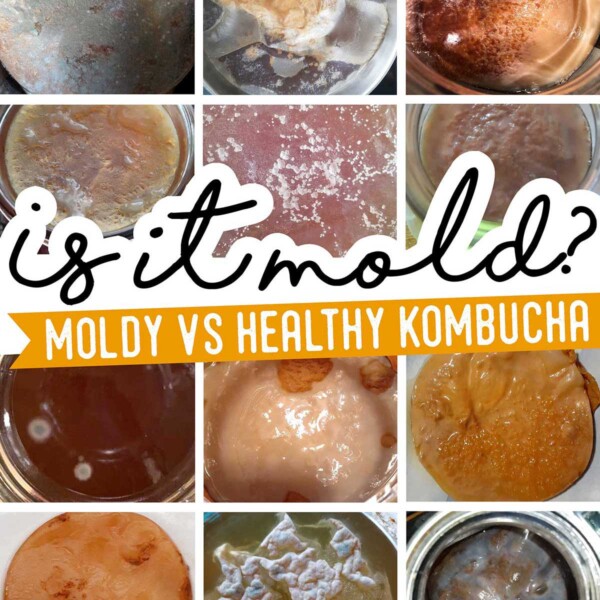
Look closely for any signs of mold – not adding the starter can lead to mold issues. If it’s just sweet tea in the first fermentation I would probably just make a new batch to be safe 🙂
I’ve been thinking of continuous brewing Jun. Can you give me any pointers?
I don’t personally have experience, but someone in our Facebook group might! Pop this question in there and I’m sure someone can help you out 🙂
Batch brewing is for me. I’m a single household and enjoy having a few bottles flavored kombucha in the frig.
Except if I send a bottle home with someone and it doesn’t return…. I’m short a bottle! Fun though. I’ve given away a scoby and love that a friend in Texas is now brewing kombucha from my California scoby!
What do you do with your scoby when you have enough Kombucha and don’t want to start another batch for a week or two?
Here’s our guide on taking a break from brewing kombucha that might help you out 🙂
Funny. I make my Kombucha without any scoby. I just buy a bottle of high quality Kombucha (the cultures need to be live and healthy), add it to some sugared tea in a class vessel, and wait for a week. You will know it is active when you add sugar to the mix and it immediately produces copious amounts of CO2. You can make yogurt, and to a lesser extent, beer similarly. It is simple propagation as any competent biolab tech will tell you.
I started flavoring in batches too! It’s so much work to get the stuff fruit ginger basil etc in the individual bottles. I flavor a gallon. Seal it up and let it sit for 3-7 days. I can strain and bottle so much easier. I add some sugar after straining and before trying to get fizzy stuff. Not a lot of luck with the fizz!
thanks so much for all the effort and wisdom you have
kicked into this kickass site
i have a problem with my spigot clogging when i do continuous
brews
any thoughts on how to minimize the growth of the scoby where it gets air….[ i am assuming that is why it grows in the spigot]
blessings and thanks again
I have this issue too! The best way I’ve found is to get a clean pipe cleaner and clean out the gunk every now and then 😀
I have been brewing for a few months with continuous brew vessel, but I treat it the same as batch brewing, in that I bottle / flavor all at one and then replace the entire contents with fresh tea in one go. I find the vessel and the spigot; I do not need to touch the SCOBY. Using the vessel / spigot combination allows me to go with continuous brew (if I choose) or batch (if I choose), getting the best of both approaches
I love this method! It’s so efficient and less prone to mold 😀
I’ve looked around your site and I feel like I saw this somewhere before – but I’m just going to ask here again. When starting a new batch Of 2nd fermentation Buch (and reserving the 2 cups and SCOBY) do you completely empty those jars with the reserved 2 cups and scoby and resterilize or can you go a few batches between washing them out?
Thanks!!!
You can go a few batches between cleanings! I do this, only washing it out every 10 batches or so (usually when the spigot gets clogged).
Thank you for all of your help! You’re the one who got me into batch brewing kombucha! I’ve been doing it for a little over a year now, this winter has been crazy busy and I accidentally let my SCOBY die by being too cold ???? But I’ll be back to it in the spring when the weather warms back up. What temp do you normally keep yours at? Would grow lights work to keep it warm?
Ah no! Winter can be so tough on SCOBYs. Aim for a temperature between 75-80°F (24-26°C) (more on that here). While a grow light would probably work, they do have heating mats (jar warmers) made specifically for this (and they’re surprisingly affordable!). I have one linked here. Happy brewing!