Using a spigot for your kombucha is a great way to make the home brewing process more easy and clean. But which is the best spigot for kombucha? And what needs to be done to properly care for your spigot? Breaking it all down here!
Why use a spigot?
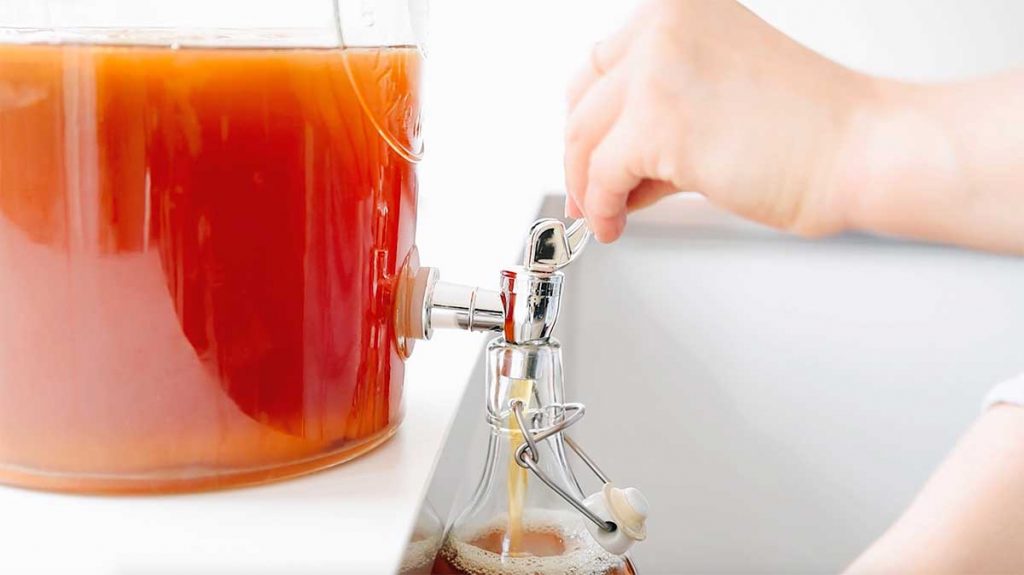
Using a spigot acts as a faucet or tap for your kombucha vessel, meaning you can easily draw out your first fermentation kombucha without having to touch the SCOBY or remove the cloth covering! Just open the tap, and pour kombucha straight into your fermentation bottles or a glass.
While spigots are most commonly associated with continuous brewing (where you draw out a little kombucha at a time), they’re also handy for batch brewing (especially if you’re working with a large vessel).
Is it safe to use a spigot?
If done correctly, using a spigot for kombucha is safe. Just be sure to keep two things in mind:
- Keep it clean: Keep your spigot clean and unclogged
- Use proper materials: Avoid low grade plastics, metallic paints, or glues (see our recommendations for best kombucha spigots below)
What spigot is best?
While there are numerous spigots you can use that are made from proper materials, these are our two favorites!
- Stainless Steel Spigot: Stainless steel (grade 304 or higher) is our favorite material for a kombucha spigot. It won’t corrode and is easiest to keep clean.
- Brew Safe Plastic Spigot: Food grade plastic is also great as a kombucha spigot. Ensure plastic is always kept clean and free from scratches in order to prevent bacteria from living on or around the spigot.
How to install a spigot
Installing a new spigot on your kombucha vessel is simple. Here’s how:
- Remove the old spigot if it’s not brew safe. Many drink dispensers come with plastic or coated dispensers that are not safe for brewing kombucha. They should easily come unscrewed and can be removed from the vessel.
- Clean your new spigot by submerging it in boiling water for a few minutes (here’s how we like to clean kombucha gear).
- Install your new spigot according to the instructions on the package (each setup may differ slightly).
- Check for leaks by filling the vessel with water and setting it over a plate or bowl for 24 hours. If it leaks, adjust the washers and rescrew it together.
- Sterilize your setup by pouring boiling water into the vessel, enough to cover the spigot. Let it sit for a few minutes then pour out the water. For a final punch, add distilled white vinegar and swish it around.
- Brew your kombucha (here’s how)!
How to care for a spigot
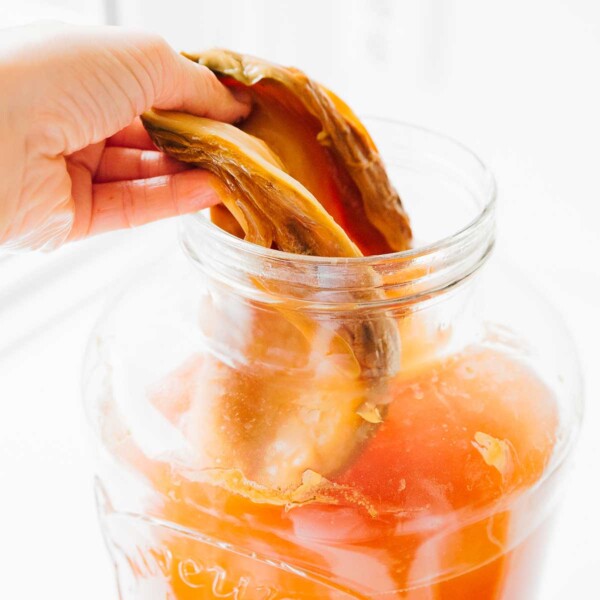
Your spigot may become clogged with yeast strands or pieces of SCOBY. If that happens, simply unclog it gently with a bottle brush or q-tip. If the spigot is still clogged, empty the vessel and remove the spigot in order to remove all the gunk.
You should also keep an eye out for build up or chipping around the spigot, which could house bacteria. With a quality spigot, however, this shouldn’t be a problem.


Where do you find the best quality spigots to brew kombucha? On my 2.5 gallon Masons seem to be good? Will do the research on that for sure…ve no idea if they are 304 or better, which one is better than a 304? I purchased a cool beverage dispenser & this one gave me pause when I did my kombucha taste thru the spigot, it had a metalic taste…ugh! Can I rinse my scoby’s with vinegar to clean them after chging the spigot? Hopefully I do not have to discard them… Thank You, Toni
Great instincts, Toni! For kombucha, 304 stainless steel is the best choice—safe, food-grade, and non-reactive. If your spigot gave off a metallic taste, it’s likely not 304 or has reactive parts, so definitely swap it out. No need to rinse your SCOBYs with vinegar (that can harm them)—just use plain, filtered water if needed. If they weren’t exposed too long and look healthy, you’re likely good to go!
hello, I need some help I have made couple of times. Kombucha and my kombucha does not get fuzzy. What do I have to do that? Mine gets fizzy.
Here’s my article where I trouble shoot why your kombucha may not be fizzy!
When you’re done with a batch, do you just add new sweet tea without cleaning everything out?
I usually do, yes! I’ll clean it out every 5 or 6 batches.
What do you do if you’re spigot is leaking in the middle of fermentation. Can I just transfer to another container and fix the spigot and then pour it back in?
It’s a slow leak but it is pooling (not much) in the sheet pan that I’ve put it into and just got my new spigot in the mail. I’d kindly appreciate your input on this matter as I’ve brewed kombucha in the past and had no issues from the first batch.
Yep you can just transfer everything to another vessel, fix it, then put it back in its original container!
I’m glad you were able to answer me so quickly because I was going to do this when I go home from work. If I don’t have another glass vessel that will fit a gallon of booch can I put it into a stainless steel pot that I have for the short time that it will take me to change out the spigot? I’m not sure if it is 304 grade like you mentioned above. They are old pots that were given to me by a relative and they are pretty sturdy so it may be 304 grade.
Stainless steel spigot?? Isn’t contact with metal (aside from a quick pour through a stainless steel strainer) supposed to be harmful to the SCOBY and the brew itself?
Fermentation grade stainless steel is okay to use here!
So I got a northern brewer kit for Christmas with the SCOBY included and I need help! It’s been 8 days ph is too high 3.6-3.8, and the SCOBY is completely at the bottom! Tastes a bit too sweet not tart, color it light. When I turned on the spigot some of the SCOBY got stuck in! It’s been totally out of light, the temperature I’m not sure of because the stick on monitor is broken. I’m so disheartened and don’t know what to do I was so looking forward to this.
This all sounds very normal! SCOBYs will sink or float, that doesn’t matter at all. And 8 days is still pretty early for it to be finished (especially in the winter). Give it time – it could take a few weeks if it’s a little cold. SCOBYs getting stuck in the spigot it common as well. You can clean it out between batches. Don’t give up, all sounds like it’s going as it should! 😀