Ever wondered how kombucha – the deliciously fizzy fermented tea – is made? We’re breaking down the basics of how to make kombucha, from start to finish! No fancy equipment or ingredients needed.
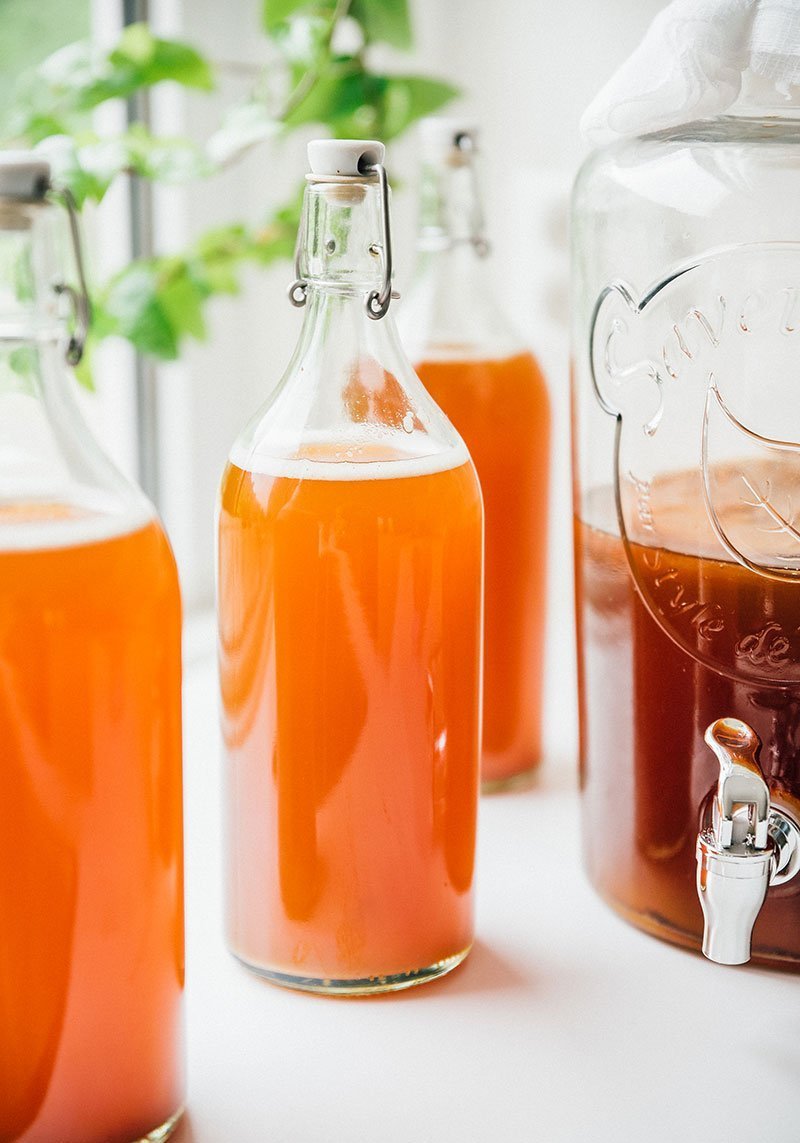
Curious how to make kombucha, the gut-loving healthy fermented tea? Tired of paying $5 per bottle when you could be making it at home for a fraction of the price? Let’s brew!
Making homemade kombucha has three main steps (click the links below to jump around the post):
- Make SCOBY (1 to 4 weeks) – make the “mother”
- First Fermentation (6 to 10 days) – make the actual kombucha tea
- Second Fermentation (3 to 10 days) – carbonate the kombucha tea

This post contains affiliate links, and I may earn from qualifying purchases.

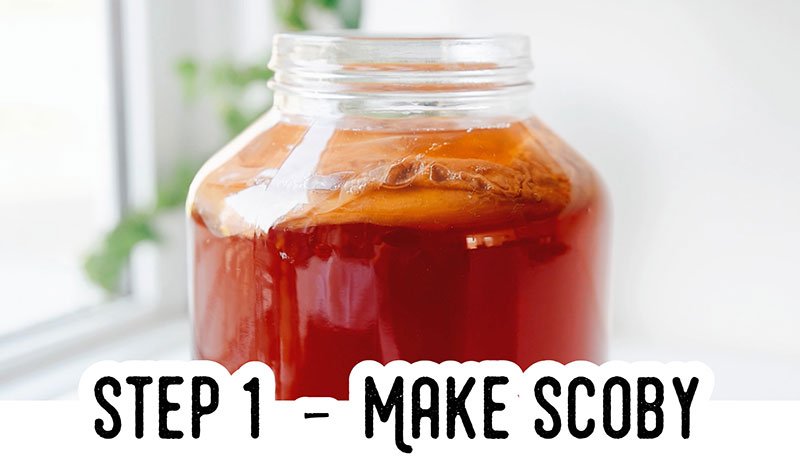
How to make a kombucha SCOBY
The SCOBY (Symbiotic Culture Of Bacteria and Yeast) is a pellicle that forms on top of the brew. The SCOBY is the “mother” that kickstarts each batch while also protecting the kombucha from contaminants like dust and debris. While you can buy a ready-made SCOBY (online or even on Craigslist), it’s easy to make it yourself!
Ingredients to make a SCOBY
- 7 cups (1.6 L) water (tap water should be fine)
- ½ cup (100 g) white sugar (sugars you can use in kombucha)
- 4 bags black tea (teas you can use in kombucha)
- 1 cup (240 mL) unpasteurized, unflavored store bought kombucha
Supplies needed to make a SCOBY
- A large glass or ceramic container (should hold at least 1 gallon (3.7 L))
- Tightly woven cloth (coffee filters, paper towels, napkins, cheese cloth)
- Rubberbands
- Large pot for boiling water
How to make a SCOBY
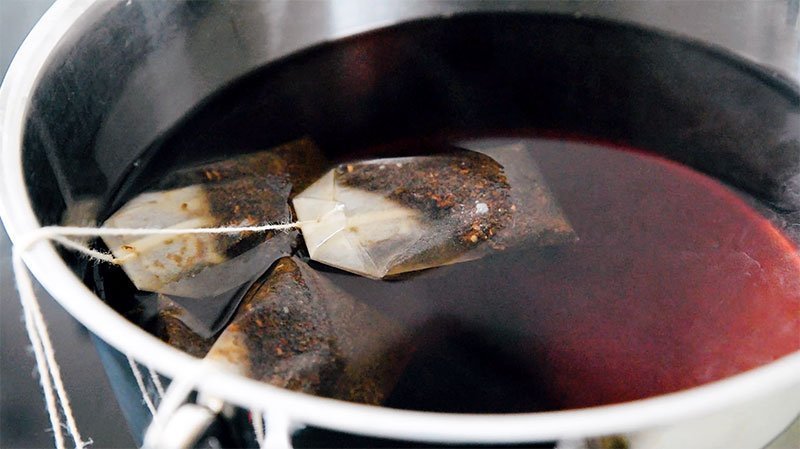
1. Make Sweet Tea: Bring water to a boil. Remove from heat and dissolve sugar into it. Add the tea bags and allow them to steep for at least 20 minutes (or until tea has cooled).
2. Cool to Room Temp: Allow hot tea to cool to room temperature. Quicken this process by boiling just 2 cups of water, dissolving the sugar, and steeping the tea for 20 minutes. Then add remaining 5 cups of cold water, which will bring the mixture to room temperature faster. Test that the tea is room temperature by drawing out some tea with a paper straw, using your finger to keep the kombucha in the straw.
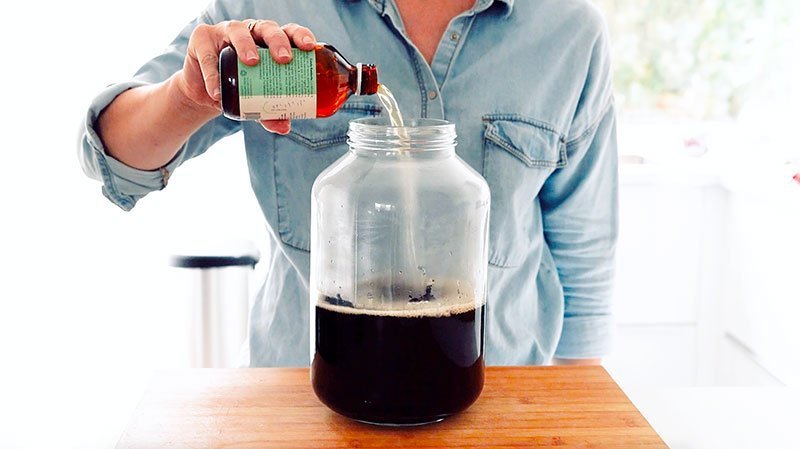
3. Add Starter: Pour the sweetened tea into your jar, then pour store-bought kombucha in, making sure to include any gunkies that may be at the bottom of the kombucha bottle. These are great for kickstarting the fermentation!
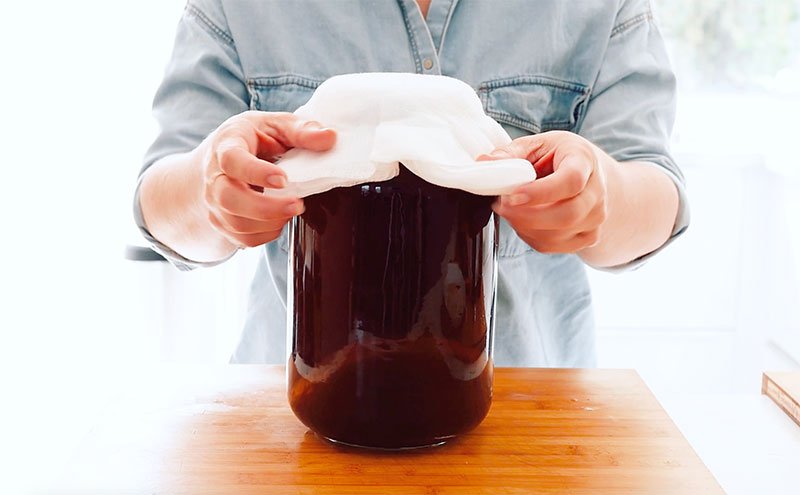
4. Cover: Cover with a few layers of the tightly woven cloth to keep out bugs and debris, securing with a rubber band.
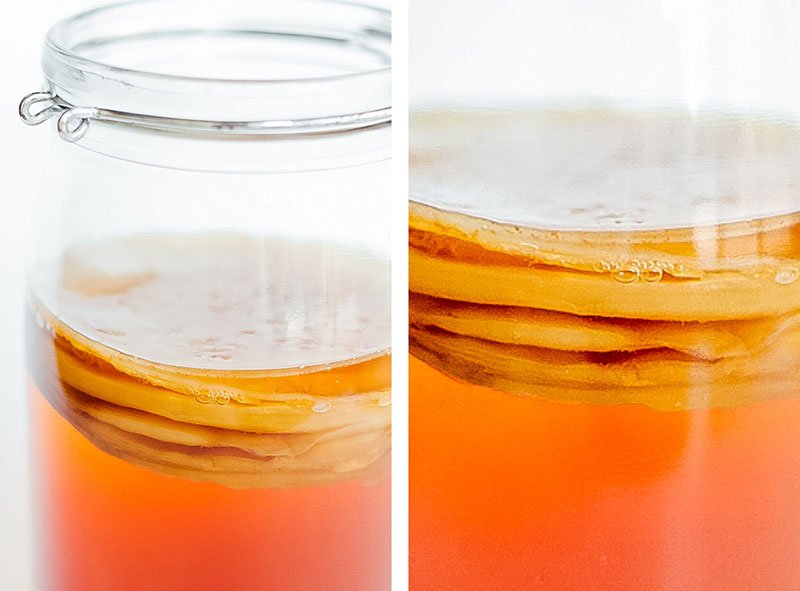
5. Ferment: Set somewhere dark, still, and room temperature (70-75 degrees F, 21-24 C) for 1 to 4 weeks, until a ¼ inch (½ cm) SCOBY has formed.
6. Go to 1st Fermentation: You now have a SCOBY! The SCOBY should live and grow for years if treated with love. Allow the SCOBY to remain in this liquid until you are ready to use the SCOBY for the next step, the 1st fermentation.
Things to note when making your kombucha SCOBY
- No decaf: The SCOBY doesn’t like decaf tea and will not grow as well if fed it.
- Only black tea: The SCOBY doesn’t grow well with green or fruity teas. Once your SCOBY is larger you can use green tea, but for now stick with black.
- No honey: Honey can contain botulism bacteria that, when grown exponentially as bacteria and yeast tend to do in kombucha, can be dangerous. You can use honey in the second fermentation, once there are a higher number of good bacteria to fight off the bad, but for now, stick to sugar.


The First Fermentation
So you’ve got a SCOBY and you’re ready to get this komboo-choo train rollin’. The first fermentation is where you actually make the kombucha that you’ll be drinking!
Ingredients for the first fermentation
- 14 cups (3.3 L) water (tap water should be fine)
- 1 cup (200 g) white sugar
- 8 bags black or green tea
- 2 cups (480 mL) unflavored kombucha (either from a previous batch or unpasteurized, unflavored store bought kombucha)
- 1 SCOBY
Supplies for the first fermentation
- A large glass or ceramic container (should hold at least 1 gallon (3.7 L))
- Tightly woven cloth (coffee filters, paper towels, napkins, cheese cloth)
- Rubberbands
- Large pot for boiling water
First fermentation instructions
1. Make Sweet Tea: Bring water to a boil. Remove from heat and dissolve sugar into it. Add the tea bags and allow them to steep for at least 20 minutes (or until tea has cooled).
2. Cool to Room Temp: Allow hot tea to cool to room temperature. Quicken this process by boiling just 4 cups of water, dissolving the sugar, and steeping the tea for 20 minutes. Then add remaining 10 cups of cold water, which will bring the mixture to room temperature faster. Test that the tea is room temperature by drawing out some tea with a paper straw, using your finger to keep the kombucha in the straw. (Don’t be impatient here – hot water will kill your SCOBY).
3. Empty the Jar: With very clean hands, transfer SCOBY to an equally clean plate. If this is your first round of kombucha, reserve 2 cups of the liquid the SCOBY was growing in (that can be your starter kombucha), discarding the rest of the liquid (it is very acidic and not nice for drinking).
4. Add Starter: Pour the sweetened tea into your jar, then pour in unflavored starter kombucha. With clean hands, place SCOBY into jar.
5. Cover: Cover with a few layers of the tightly woven cloth and secure with a rubber band.
6. Ferment: Set the jar somewhere dark, still, and room temperature (70-75 degrees F, 21-24 C) for 6 to 10 days. Begin tasting at about 6 days by gently drawing out some of the tea with a paper straw (using your finger to hold the tea in the straw – don’t use your mouth). It should be mildly sweet and slightly vinegary. The warmer the air temperature, the faster the kombucha will ferment. The longer the tea ferments, the more sugar molecules will be eaten up, the less sweet it will be.
7. Go to 2nd Fermentation: Reserve 2 cups from this batch to use as starter kombucha for your next batch (just leave it in the jar with SCOBY). The rest can move into the second and final fermentation.
Things to note about the first fermentation
- Other teas can be used in this step! Feel free to experiment with green, white, oolong, or combinations of them. Fruit teas should be mixed with a few black tea bags to ensure the SCOBY gets what she needs to thrive.
- Big SCOBY? Once the SCOBY gets to be about an inch thick, peel off a few layers to create a second SCOBY (use it to create another batch or gift it to a friend!)

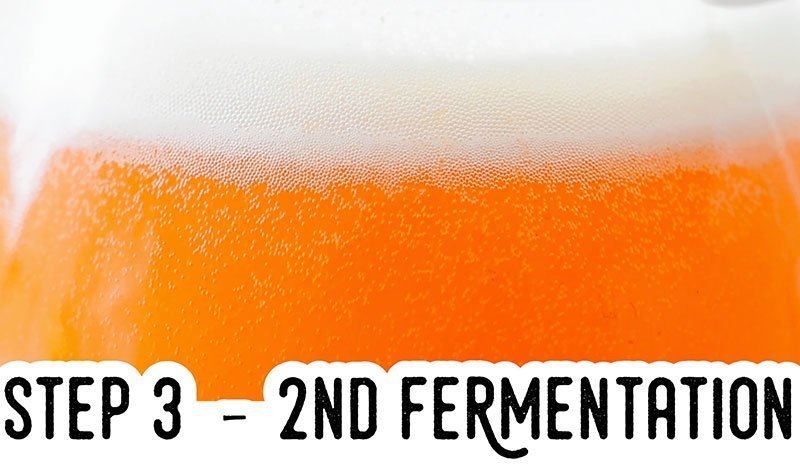
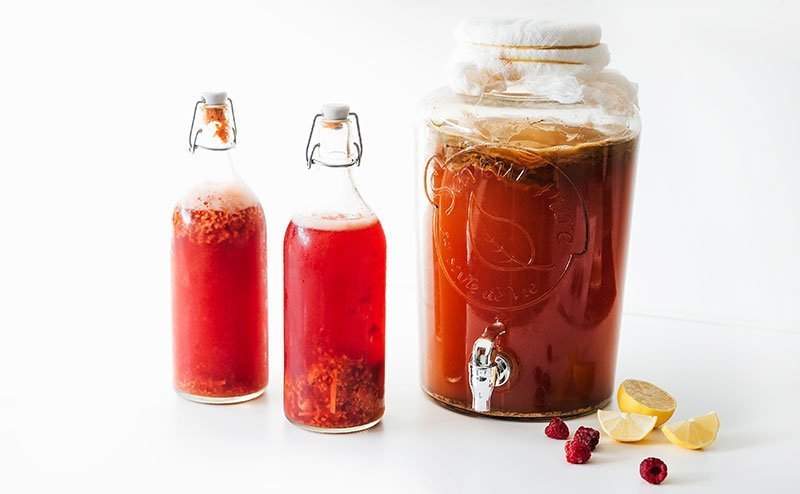
The second fermentation
The final and most fun step in the homemade kombucha making process! The second fermentation is where the real magic happens, flavoring and carbonating your kombucha into effervescent bliss.
Ingredients for the second fermentation
- Homemade kombucha from the first fermentation
- Sweetener (fruit, honey, or sugar). While there are many flavor combinations here on Brew Buch, we generally work with a ratio of 1 cup kombucha to:
- 1 to 2 Tbsp mashed fruit or fruit juice
- 1 to 2 tsp honey or sugar
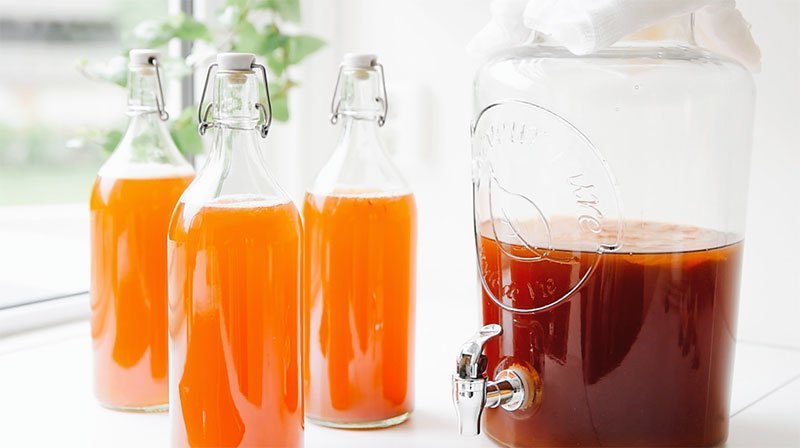
Supplies for the second fermentation
You just need a few flip top fermentation bottles for the second fermentation. These bottles are meant for fermentation and have an airtight seal, which will prevent carbonation from escaping. If you don’t have these, canning jars will do an alright job, though they aren’t truly airtight.
Second fermentation instructions
1. Bottle: Funnel kombucha into bottles, leaving about 1 1/2 inches at the top (3.8 cm).
2. Sweeten: Add your chosen sweetener and seal tightly.
3. Ferment: Let ferment somewhere dark and room temperature for 3 to 10 days.
4. Serve: If desired, strain out fruit before serving. Place in fridge to slow the carbonation process and to chill before serving.
Things to note about the second fermentation
- Blast Zone: Your jars can explode if the pressure becomes too high! For your first few batches while you’re still getting the hang of how kombucha reacts to your environment, bottle a portion of it in a plastic bottle. This will act as a gauge for the others; when the plastic bottle is rock solid, the rest are probably done. “Burp” them by opening each to release some pressure, then place them in the refrigerator to slow fermentation.
- Faster Fermentation: Be aware that the kombucha will ferment more quickly when it is warmer and when there is more sugar/fruit. It will ferment more slowly in the opposite conditions!
- No fizz? Check out our troubleshooting guide to flat kombucha here.
This guide to was originally published on our sister site, Live Eat Learn, as part of the Simple Guide to Kickass Kombucha!
How long does the SCOBY last once you’ve made your first batch?
What do you do to keep it ‘fed’ and how often do you do that?
It should last a very long time, just be sure to feed it at least once a month! More on how long SCOBYs last here 😀
Hello! I made 3 liters of kombucha with your recipe. After 3 days of the first fermentation the liquid is already too vinegary and the sugar still too present. Should I put less sugar and stop the first fermentation after 2 days or should I share my scoby (it’s a little less than 1cm)? Or should I do something else? Thanks for your tips.!
This is likely an issue of overactive yeast! We have an article on how to prevent and fix vinegary kombucha here 😀
Is there a reason for oversteeping the tea so dramatically before feeding the SCOBY? Can I steep the black tea as usual (5min) and just make sure it fully cools before adding?
Yes that would work!
Hey Sarah! Thanks so much for the tutorial it’s amazing!
I’m on grow-your-scoby part and it looks like it’s going great! However I did use a narrow bottleneck jar so I don’t think I can take it out easily.
But reading the instructions of the 1st fermentation I’m wondering if I could just empty that jar of all liquids and do the 1st fermentation in there directly so that I don’t have to move the scoby around.
Would that make sense?
Yep you can definitely do that! But your SCOBY will continue to grow so eventually you’ll need to take it out, and it may be easier now that it’s smaller.
I made buch for a few years, then took a break for several
years more. I was surprised that I had forgotten so much about the entire process. I have started making it again, beginning with
making the scoby. Your website is very informative and the
steps are easy to follow. Going forward, you’re my go-to website.
Can I do the second fermentation in a large jar with the fruit and transfer to the flip top bottles at the end? I feel like it would be easier to strain out the fruit as I transfer
Yes, that would work! One step to flavor, and another step to carbonate (versus all at once).
How do you do two different processes ?
You flavour with fruits and sugar and the how long should you wait to carbonate? then for the carbonation, you just put in the bottles and then the fridge? the carbonation happens because they’ll be closed??
If you’re going to do it this way I would flavor with fruit for 5 to 10 days. Then close it, which lets it carbonate, for 2 to 3 days at room temp 😀
I just finished my second fermentation, and reserved 2 cups of liquid with the scoby! And now I’m not sure where to go from here. Do I go back to the first fermentation step again? Thanks!
Correct! That 2 cups is now the “starter” for your next first fermentation.
I appreciate your quick responses. I’m ready for my second batch of kombucha and my SCOBY is awaiting in the big glass jar with the starter kombucha from the first batch. Do I need to wash the jar before starting again, or just add it to the SCOBY/starter?
P.S. my first batch didn’t carbonate a lot but I reread your posts and realized I was being overly cautious about burping and rushing. It is still delicious, however!
If you’re brewing in the same vessel you don’t need to wash it necessarily, as long as you didn’t touch the inside too much and it’s still clean! 😀
Just want to thank you SO MUCH for this site. I finished my first brew a few days ago, and I can’t get over how delicious it is! Btw, your cherry rose flavor is sheer genius. It’s beyond delicious. I’m so excited for this new hobby, and luckily I have an interested friend to share it with, which makes it more fun 🙂
Sarah,
This is my third batch of kombucha. First and second batch were very successful. Now this third batch when I take the SCOBY out I see some bubble like hump. How can I tell if this is not mold? I had read thro all your picture at the mold article but I can’t be 100% sure if it has mold or not. How can I email the picture to you?
Feel free to post photos in our Facebook group and the community should be able to help you out!
Hey Sarah! I just filtered out the gunk and fruits after second fermentation, I’m assuming I can just throw that out, or is it useful for something?
You can just throw them out! They’re edible though so you could throw them in a smoothie or use them in some way! 😀
I couldn’t find any plain kombucha at the store to use for the first fermentation, so I tried to pick one that seemed to have somewhat neutral flavors. Will this be a problem for my kombucha?
Also, I made a full batch of tea + sugar mixture but only had enough SCOBY for one of my two mason jars. I rubber-banded a paper towel over the other jar and saved it. Will I be able to use this for my next batch? Thanks!
Hi Carson! Here’s my guide on where to buy unflavored kombucha – it’s really best to use unflavored.
And stick that extra tea in the fridge to hopefully prevent mold!
Thank you so much for this recipe. It’s my go-to.
What are the nutrition facts for this particular kombucha recipe’s yield?
The nutrition info for home brewed kombucha can vary greatly depending on how long you let the fermentation go. But typically, 1 cup of kombucha contains 50 calories, 12g carbs, and no fat or protein.
Can kombucha bottles blow up in the refridgerator before you drink them?
Technically they *could*, but it’s not likely because the fermentation slows down so much when it’s in the fridge.
Read your site about making Kombucha seen a spot saying metal wasn’t good for the scoby. I was really wanting to go with a spigot glass jar and seen you used one. Is your spigot not stainless steel? Will it really effect the scoby? Do you have any suggestions to a good quality spigot one to use by chance?
I actually wrote an article on the best spigots for kombucha brewing here! 😀
What a fantastic guide/website. As someone with IBS who has felt relief from store bought Kombucha, I can’t wait to brew this alongside my mead!
Yay! So happy you found the site, welcome! 😀
Thanks so much for this straight-forward guide. This is my first ever batch and today is second fermentation day. The only thing I’m nervous about is the Scobys. So of course I have my original scoby which is kind of attached at one side of the new Scoby growth and then floating in the rest of the brew. I plan on starting a new batch right away. Do I use both the original Scooby and the new growth in this next batch? Do I get rid of the new growth? Do I store the new growth alone in its own little jar so it continues to grow? Thanks!
Any of the above! I like to store extra pellicles in separate jars to have extras on hand (and so that they don’t take up precious space in my jar) 😀
I made my first batch – turned out well! My question is if I should seal the 2 cups of starter and SCOBY or keep the cheesecloth covering until the next batch?
Keep it covered with a cloth! 😀
Can I flavour it with herbal or mixed teas in the second fermentation instead of flavouring it with fruits or sugar?
Yes! 😀
Hello, if I want to use my SCOBY liquid (not the pellicle) as something else (vinegar, for example and NOT to be used for future kombucha batches), could I store that liquid with the jar sealed, in the fridge?
And also, do you have any advice on how to utilize the leftover SCOBY liquid?
Thank you!
You can bottle and store it in the fridge as backup starter kombucha! Or let it keep fermenting at room temp to turn into kombucha vinegar.
Thanks so much for such informative posts! I’m on my second fermentation and can move to the flavoring state. Would it be OK to drink the Kombucha as it is? Do I need to bottle portion sizes and let it sit in a closet for a few days before refrigerating?
Right now, it tastes slightly sweet, slightly carbonated, and vinegary.
Thank you!
Yep you can always just drink if straight from the F1 if you want to!
Hi, very clear process, thank you. I only have one question though. Under ingredients for the first fermentation, how much is 1 SCOBY (cc or mg)?
Thanks.
There’s not really a standard size (what’s MORE important is the starter kombucha measurement). Usually a SCOBY that’s about 1/4 inch thick is enough to help get the fermentation going.
Can you show us how to make it without buying premade kombusha?
That’s a bit tough because you need that initial inoculation of those specific bacteria and yeast to start the process. You could look in a Facebook group or in your local area to get some starter from a home brewer!
I just purchased a scoby and it came with about a cup of tea. If I use the tea to make my first batch then what do I do with the scoby ?
The SCOBY can be added into the jar as well!
I have 4 liter 1st fermented kombucha which flavour and how much amount should i add to make it the best kombucha
That’s the fun part! You can check out all of our kombucha flavors here.
Hey Sarah i was proudly showing how my SCOBY had started to grow its pellicle (~2 cm) and i set it down too hard and it sank to the bottom! what should i do???
Oh no!! Can you dig it out and rinse it really well? Then place it in a jar of already brewed kombucha for a few days to help sterilize it before starting a new batch with it.
meant to say ~1/4 inch
I think it’ll be fine. It will rise itself to the top again! 🙂
I noticed in some pictures you have a jug with a spout. What is the purpose of this? Is it better to ferment in a jar with or without a spout? Thanks
It’s personal preference! I like using the spout to easily draw off kombucha once it’s done 😀
Hi! I am on my second fermentation for the first time! So exciting!
What are some warning signs to look out for in my batch other than mold that could indicate contamination with other bacteria? I have been told it’s not always safe to drink homemade Kombucha but I don’t want to be dissuaded!
Are there ways other than pH strips to tell if my kombucha is acidic enough to deter contamination?
Thanks!
The “good” bacteria and yeast in the kombucha are typically enough to ward off any contamination. But contamination would very likely be obvious (i.e. mold). If it smells, tastes, and looks good, it’s very likely good! 😀
What do you mean by rock solid? Thanks!
The firmness of a tennis ball! 🙂
When you try to squeeze the sides of the plastic bottle, there is no give, it is hard like a rock.
I made a batch of kombucha and for the second ferment I just added all my fruit, ginger, pineapple and blood orange as well as some raw sugar to the large jar and covered as tight a I could. Will this way work? I was just tired of dealing with all the fruit In the small jars it would make with all the co2 and pulp
It will definitely get flavored, but it may not be as fizzy without using fermentation bottles.
I also hate cleaning out bottles. I do basically the same thing you do, except after the kombucha has been in the jar with the fruit for a couple days, I strain it into flip top bottles to carbonate. Lots of flavor ,lots of bubbles, takes slightly longer, but I like the result.
How do I flavor the kombucha? My favorite to buy has been Brew Doctor Kombucha Citrus earl grey with blood orange, bergamot, lemon, and black tea. I would like to make one like that.
Hey Alexandria! You can check out all of our kombucha flavors here! 😀
I have a huge scoby (I think it has about 5 or 6 layers). How much do I need to keep and how much can I give away? Does it matter which part of the scoby I keep? Top/ bottom?
You can give away most of it, you really just need 1/4 inch or so (many people would say you don’t need it as all, but I like to have one on top of my brew to seal it off and protect from contaminants). I would keep the bottom, which has all those beneficial yeast strands usually.
Great recipe! I started mine a few months back & have made several batches now! It’s even fizzy before the second fermentation! Great flavor.
Can I double the amount of tea/sugar & add it to the kombucha? I’m using a gallon jar & there’s so much more room than it’s recipe calls for.
Yep you can scale it up or down as much as needed, just keep all the ratios the same!
Hi Sarah,
Can you explain whether mass of SCOBY affects the brewing time for the kombucha and why? For example a SCOBY mass of 0.5 g and 1.5 g, the 1.5 g will drop pH lower right?
Hi Lawrence! The size of the SCOBY doesn’t really have much impact, but the presence of one does (I write about that a bit in this article on whether a SCOBY is even needed in brewing!)
Love the recipe and diagram! Is there a way I can make a half-batch of the recipe for the second fermentation? And would I be using the full scoby or only half of it if so?
You can make a half batch! The SCOBY size doesn’t really matter, as long as tea / sugar / starter kombucha ratios are all the same.
Hi, I added fruit during second fermentation and just burped all my bottles and refrigerated. At what point should I strain out the fruit? Can I strain all the bottles right now, or will it lose its carbonation? Alternatively, should I wait to strain just before I drink it?
I like to strain right before I drink it to preserve the carbonation! 😀
Hello,
Do I need to add a store bought Kombucha to every time I make a batch? or is that for the first ferment only?
First time only! After that you can simply use the kombucha that you make 😀
Great info – thank you!
I’ve been gifted a scooby in a couple of cup fulls of black tea kombucha. In order to make some more kombucha, can I use this black tea rather than an an unflavoured kombucha (as per your instructions) as an ingredient in the first ferment? Many thanks.
Yep, correct you can! 😀
Hi! I’m on my first ferment again (with an already established scoby). Between my last batch and this one, it’s been a few weeks, and the scoby + reserved liquid have been left in a cool dark place. The reserved liquid is very acidic at this point. Should I use it in my ferment, or should I use a different kombucha with the scoby?
You can use that strong kombucha as a starter! 😀
i am new at this and i have a couple questions? When you boil your water before adding tea…..can you use a pot that is teflon coated, or any kind of metal pot? Next question is do you half to use a paper straw instead of plasic one?
Any kind of metal pot works! And you can use any kind of straw 🙂
HEY! Thank you for your post! I am excited to start making kombucha. I do have a question.
I am going the route to make my own scoby. When I am making my fresh batch of tea for the 1st fermentation, can i use the brew from making the scoby as my starter kombucha for the 1st fermentation?
Yes! That’s potent starter tea and works well 🙂
What size of tea bags do I use? Regular cup size or the big family size, I have a two gallon continuos kombucha crock, does it matter if the tea is strong brew?
Thank you in advance
All recipes listed here are for regular sized tea bags! 🙂
Will the kombucha become an alcohol beverage if second fermentation extends beyond 10 days?
It will have slightly more alcohol, but probably not enough to be considered an alcoholic beverage. Here’s how to make hard kombucha! 😀
Hi! Recently, I had the opportunity to try kombucha for the first time, which I ordered on this website, and I immediately became a fan. I will be just starting my kombucha journey, so thank you for your post! I also have a small question, can kombucha be consumed directly after the first fermentation?
Yes it can! 😀
Storing SCOBY between batches?
Make a jar with some tea and sugar to keep it fed?
Put it in the fridge?
Leave it a room temp?
Sealed or breathable container?
Here’s our guide to taking a break from brewing (short or long term). Happy brewing!
Hi! I am moving into my 2nd round of fermentation (adding ginger and strawberry!) but noticed my kombucha is already fizzy! Do I need to adjust my time to not have an explosion since it’s already partially carbonated? (I tasted some from the 1st fermentation and it’s not as fizzy as it should be, but maybe 3/4 of the way there.)
Yep, adjust the time! It’s ready when it’s nice and carbonated (you could try “burping” the bottles frequently to prevent explosions).
Does the second fermentation add any nutritional/medicinal value?
Thanks
Not really, the second fermentation really just adds flavor and fizz 🙂
I used your list of supplies as a guide for buying what I need to start fermenting my own kombucha, thank you for all the helpful info!
I do have one question; As I began to prep my first batch for F1, I started reading from multiple sources saying cheesecloth should be avoided for covering fermenting kombucha. Allegedly, fruit flies can wriggle through cheesecloth even if it’s folded over. Any comment on that statement?
Thanks!
I use cheesecloth that has been folded over a bunch of times to prevent this! You could also use a clean towel or even paper towels 🙂
Hi. I just made my first batch of kombucha. It is 7 days and I decided to check on its progress. I see that I left 2 bags of organic black tea (no metal staples) in it. I took a very tiny taste and it tastes ok – a little vinegary. See if I get sick. The new Scoby is maybe a 1/4” thick at the top and covers the entire top of the 1 gallon glass container. It has strings. Is it safe to drink? I’ve returned it covered (without the added tea bag) to its dark hideaway. Thank you.
It sounds totally normal to me! Just fish those bags out 🙂
Hey there, I’m just getting started & so pumped! Thank you for your post!
One of my tea bags broke on step one. Is it bad to leave some of the loose tea in there while the scooby is developing over the next few weeks?
Scoop out as much as you can, but it’s not a deal breaker!